
Treating Fractures in the Field
Lesson 2: Spinal
Injuries
Section II: Immobilizing a Suspected Spinal Injury
2-6
2-6. IMMOBILIZING A CASUALTY USING A LONG SPINE BOARD AND LOG ROLL
The log roll technique is the preferred method of placing a casualty with a spinal injury onto a long spine board. The technique requires four people (yourself and three assistants). You should maintain manual traction of the casualty's head while supervising your assistants.
a. Position Long Spine Board. Have an assistant obtain a long spine board and place it next to and parallel with the casualty.
b. Secure Wrists. If the casualty is unconscious, have an assistant place the casualty's wrists together at his waist and tie them together loosely without compromising circulation. A cravat is normally used to secure the wrists. Securing the casualty's wrists will make it easier to position him on the long spine board and will keep his arms from moving off the spine board.
c. Brief the Casualty. Tell the casualty that you are going to place him onto the spine board. Tell the casualty that he should not try to move; the assistants and you will move him without any effort on his part.
d. Position Assistants. Have the three assistants kneel on the same side of the casualty (the side away from the spine board) as shown in figure 2-5. If one of the assistants is more experienced than others, place him at the casualty's chest.
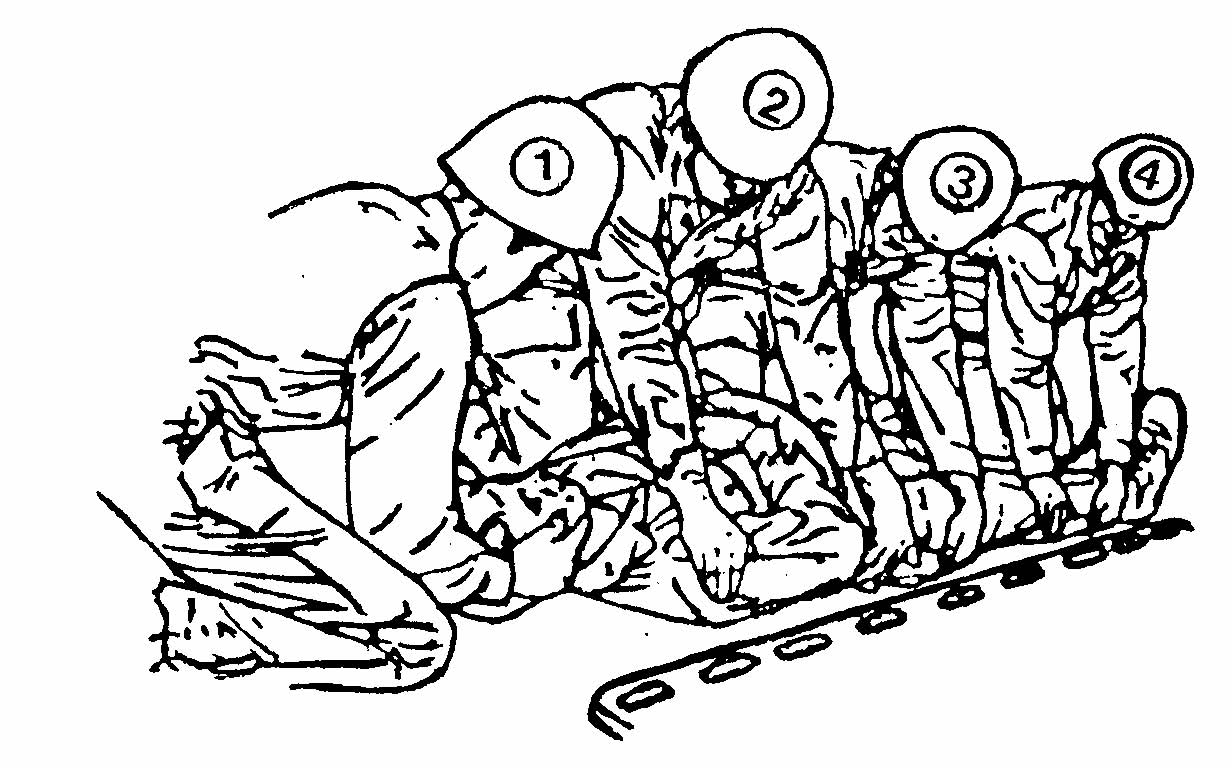
Figure 2-5. Placing a casualty on a long spine board using the log roll technique.
(1) Have the first assistant kneel near the casualty's chest and reach across the casualty. Have him place one hand at the casualty's far shoulder and the other at the casualty's waist.
(2) Have the second assistant kneel near the casualty's hips and reach across the casualty. Have him place one hand at the casualty's far hip and the other at the casualty's far thigh.
(3) Have the third assistant kneel near the casualty's lower legs and reach across the casualty. Have him place one hand at the casualty's far knee and the other at the casualty's far ankle.
e. Roll Casualty. Upon your command, have the three assistants roll the casualty slightly toward them in unison. As they roll the casualty, turn his head slightly to keep it in alignment with his spine.
NOTE: While the casualty is on his side, the back should be assessed for step off's,
deformities, contusions, abrasions, punctures penetrations, burns,
lacerations, and swelling (DCAP-BLS) and for tenderness, instability, and
crepitation (TIC) as well as for rectal bleeding.
f. Slide Board Into Position.
(1) If a fourth assistant is available, have him slip the spine board under the casualty.
(2) If a fourth assistant is not available, have the middle (second) assistant release his hold on the casualty's hip, grasp the closest edge of the spine board, and slide it against the casualty.
Then have him release the board, reach across the board, grasp the far edge, and hold the board in place so it will not slip as the casualty is placed on the board.
NOTE: If needed, all three assistants can release one of their holds on the casualty to help move the spine board beneath the casualty. If this is done, the first and third assistants return to supporting the casualty with both hands while the second assistant uses one hand to prevent the spine board from slipping.
g. Position Casualty on Board. Have the assistants slowly lower the casualty in unison, allowing the casualty's back to rest on the spine board. As they lower the casualty, turn his head slightly to keep it in alignment with his spine. Position the casualty with his body in the middle of the spine board.
h. Place Padding Beneath the Casualty. Have the assistants slip padding (folded towels, jackets, and so forth) at the natural curves beneath the small of the casualty's back, beneath his knees, and beneath his ankles. Have an assistant place additional padding beneath the casualty's neck.
i. Secure Casualty to Board. Have the assistants secure the casualty to the long spine board using patient securing straps and cravats as shown in figure 2-6.
(1) Secure the casualty's chest (and upper arms if straps are long enough), hips, thighs, and lower legs to the spine board using the patient securing straps. Cravats or strips of cloth can be used if securing straps are not available.
(2) Secure the casualty's head to the spine board with a cravat. Folded material or socks filled with sand may be placed at each side of the casualty's head before the cravat is applied to provide additional stability.
NOTE: The head is secured last to allow it to remain in-line with the body through-out
the securing process.
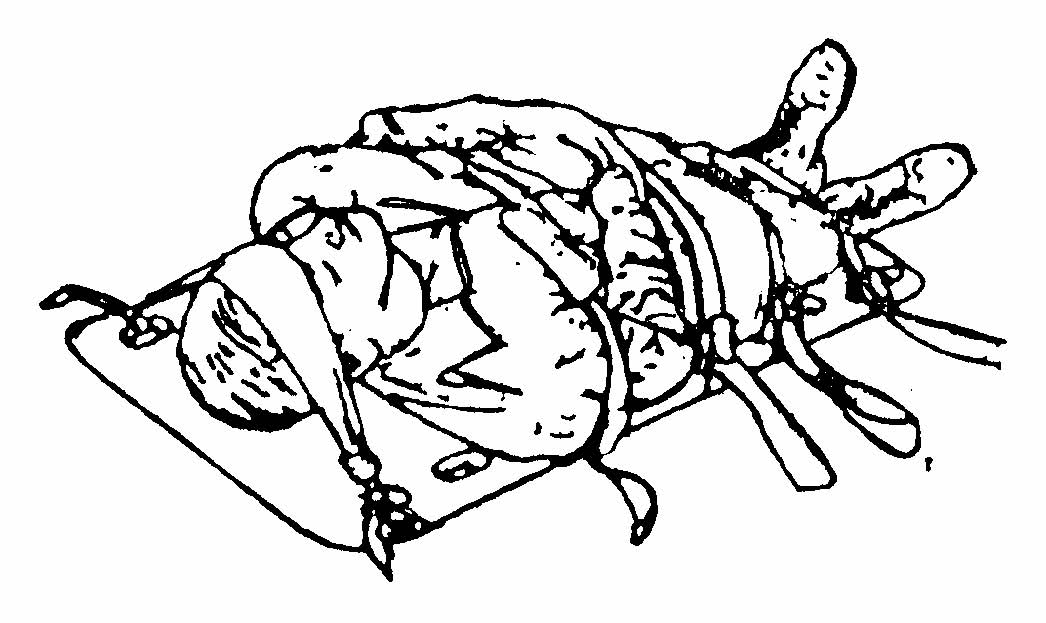
Figure 2-6. Casualty secured to a long spine board.
