Skip to content
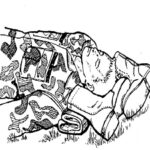
Figure 3-6. Securing a traction splint to the litter using a roller bandage.
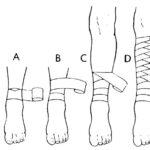
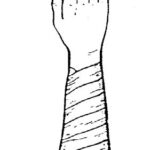
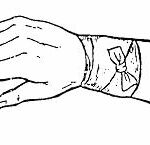
Figure 6-5. Applying a spiral reverse wrap.
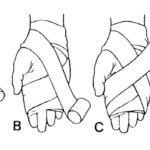
Figure 6-6. Applying a figure-eight wrap.
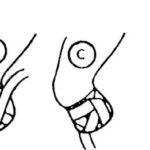
Figure 6-7. Applying a recurrent bandage to a stump.
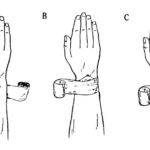
Figure 6-2. Applying an anchor wrap.
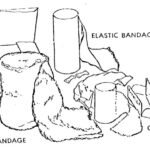
Figure 6-1. Examples of bandages.
Figure 5-13. Swathe used to immobilize a fractured forearm.
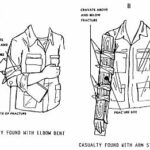
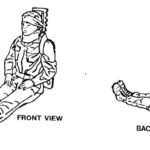
Figure 5-12. Swathes used to immobilize a fractured elbow (not bent).
Figure 6-4. Spiral wrap.
Figure 6-3. Circular wrap.
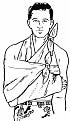
Figure 5-9. Applying a triangular bandage sling (arm sling number two).
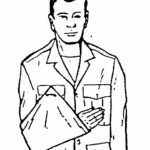
Figure 5-10. Jacket flap sling.
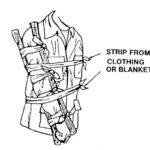
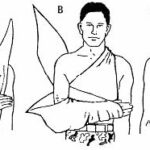
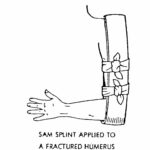
Figure 5-11. Sling and swathes used to immobilize a fractured humerus (chest used as the rigid object).
Figure 5-8. Applying a triangular bandage sling (arm sling number one).
Figure 5-7. Improvised splint applied to a fractured forearm.
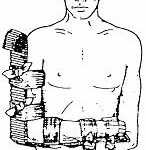
Figure 5-3. Wire ladder splint applied to an injured arm.
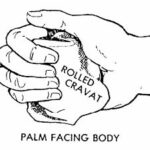
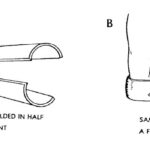
Figure 5-2. Rolled cravat placed in palm of injured hand.
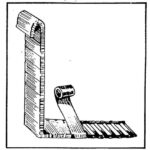
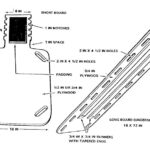
Figure 5-1. Padding a wire ladder splint with a roller bandage.
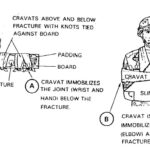
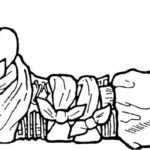
Figure 5-6. Improvised splints applied to fractured elbows.
Figure 5-5. Upper arm immobilized using a SAM splint.
Figure 5-4. Immobilizing a forearm using a SAM splint.
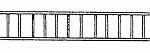
Figure 4-10. Wire ladder splint.
Figure 4-11. Wire ladder splint (two pieces) applied to a fractured ankle.
Figure 4-12. Wire ladder splint (three pieces) applied to a fractured ankle.
Figure 4-13. SAM splint applied to a fractured ankle.
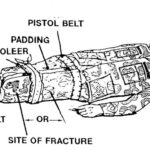
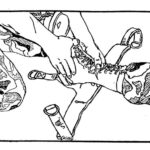
Figure 4-4. Improvised splint applied to a fractured femur.
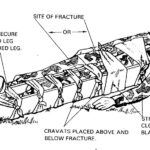
Figure 4-8. Uninjured leg used as an anatomical splint.
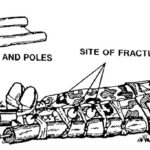
Figure 4-7. Improvised blanket and poles splint applied to a fractured leg.
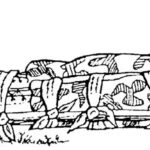
Figure 4-6. Improvised tree limb splint applied to a fractured leg.
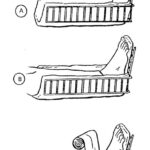
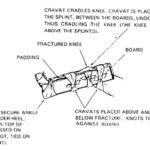
Figure 4-9. Board splint applied to a bent knee.
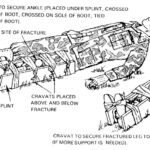
Figure 4-5. Improvised board splint applied to a fractured leg.
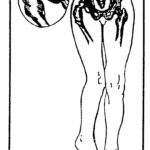
Figure 4-2. Posterior dislocation of the hip.
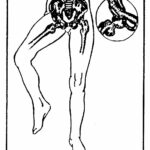
Figure 4-3. Anterior dislocation of the hip.
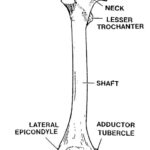
Figure 4-1. Femur.
Figure 3-2. Ankle hitch applied to the casualty.
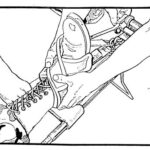
Figure 3-1. Positioning the ankle hitch of a Hare splint.
Figure 3-5. Applying mechanical traction with the Hare splint.
Figure 3-4. Positioning the Hare splint under the casualty’s limb.
Figure 3-3. Applying manual traction and lifting the leg.
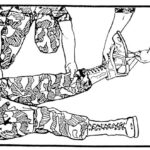
Figure 2-9. Padding placed under the casualty’s neck and back.
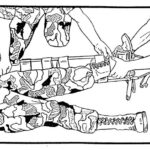
Figure 2-10. Casualty’s head immobilized with boots.
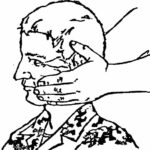
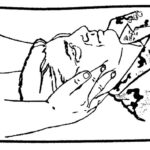
Figure 2-7. Applying manual traction to a casualty’s head (casualty sitting up).
Figure 2-8. Short spine board and cervical collar applied to a sitting casualty.
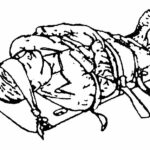
Figure 2-6. Casualty secured to a long spine board.
Figure 2-2. Short (left) and long (right) spine boards.
Figure 2-1. The spinal column and a typical thoracic vertebra.
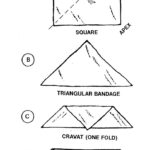
Figure 2-3. Making a cravat.
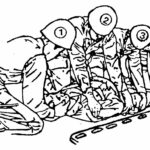
Figure 2-5. Placing a casualty on a long spine board using the log roll technique.
Figure 2-4. Applying manual traction to a casualty’s head (casualty on his back).
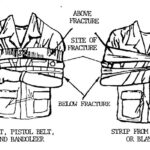
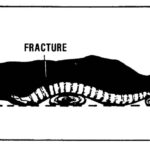
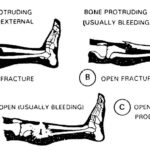
Figure 1-3. Examples of fractures.
Figure 1-1. The human skeleton (anterior view).
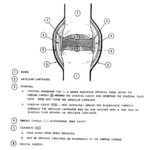
Figure 1-2. Example of a joint.
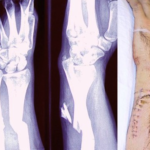
Wrist fracture
fractures