Eye, Ear, and Nose Injuries
Lesson 6: Irrigate an Obstructed Ear
6-7
6-7. PROCEDURES TO IRRIGATE THE EAR
a. Perform a patient care handwash and gather the equipment and solutions required for the ear irrigation.
b. Warm and test the solution.
(1) Place the container of warm solution in a pan of warm water until solution is between 95º to 105ºF (a little warmer than the normal body temperature).
(2) Test the temperature of the solution by allowing a small amount of the fluid to run on the inner aspect of the wrist.
NOTE: Cold solutions are uncomfortable and may cause dizziness or nausea as a
result of stimulation of the equilibrium sensors in the semicircular canals.
c. Insert the otoscope speculum into the external ear canal.
(1) Assist the patient to assume the position, which allows a good view.
(2) Tip the patient's head toward the opposite shoulder or ear to be irrigated.
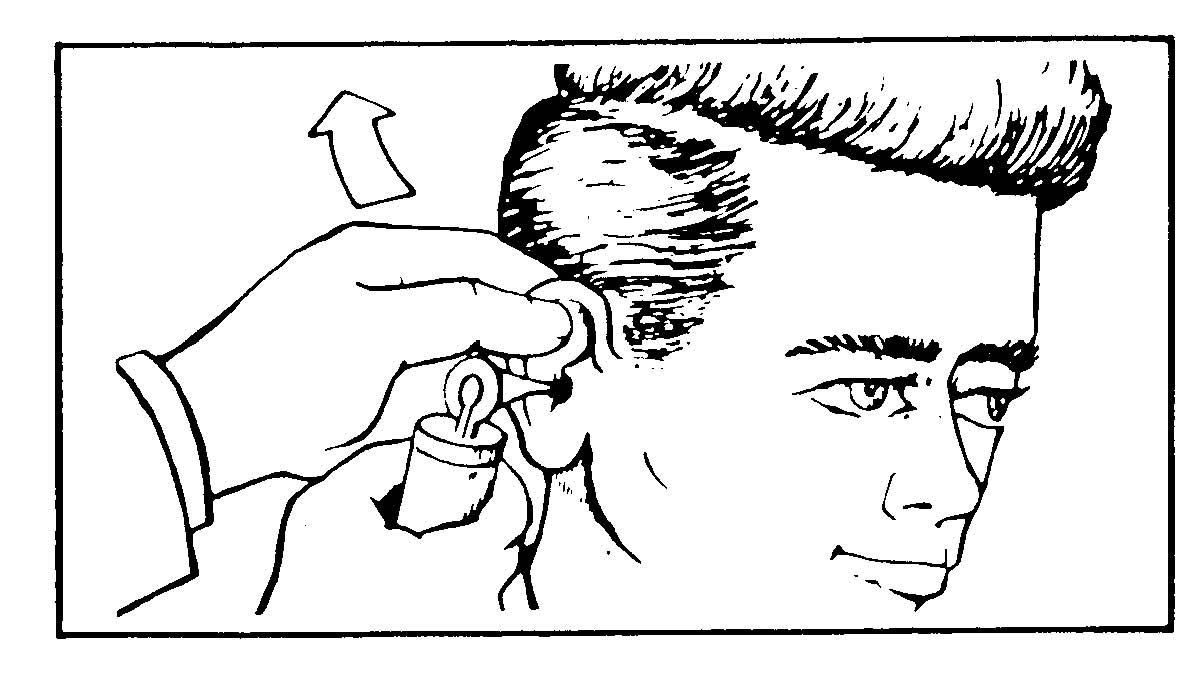
(3) Straighten the external ear canal by gently pulling the auricle upward and backward for adults, and downward and backward for a child.
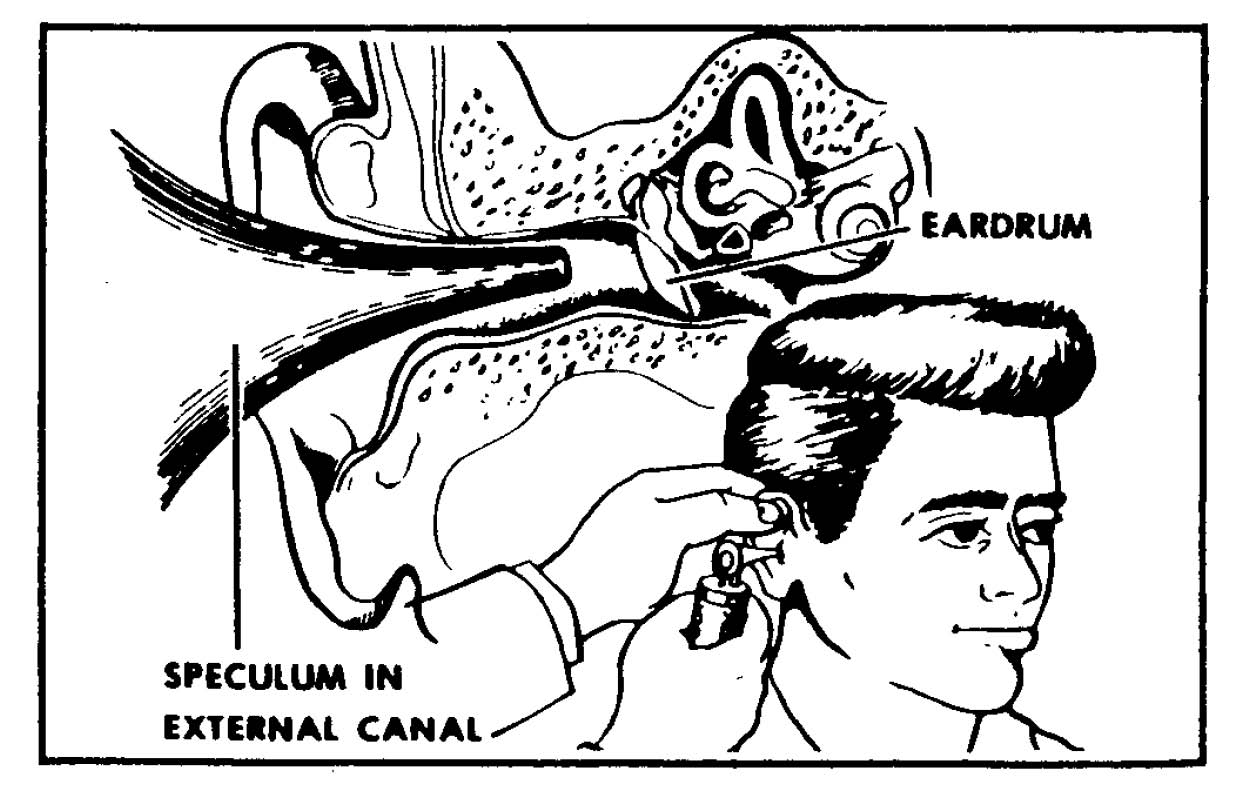
(4) Turn on the otoscope light and insert the speculum just inside the opening of the ear (see figure 6-4).
d. Observe the external ear canal and the tympanic membrane for abnormalities.
(1) Check the external ear canal for redness, swelling, drainage, or foreign bodies.
Figure 6-3. Straightening the external ear canal.
Figure 6-4. Speculum inserted.
(2) Check the tympanic membrane for bulging, perforation, and color change.
(a) Normally, a blue, yellow, amber, red, or pink eardrum indicates disease of infection.
NOTE: The eardrum is normally shiny and pearly gray.
(b) A continued bulge in the eardrum indicates possible pus or fluid in the middle ear. Do not irrigate the ear.
(c) If a hole or tear is noted when viewing the eardrum, do not irrigate the ear. It would cause pain and possibly transmit serious infection to the middle ear.
NOTE: A hole or tear in the ear should be reported to the supervisor.
e. Position the patient for irrigation. The patient should be positioned with his head tilted slightly towards the affected side. This position is used for a patient sitting or lying.
f. Drape the patient. Drape his shoulder with absorbent pads under the affected ear; cover the shoulder and the upper arm area.
g. Cleanse the external ear and meatus at the entrance of the ear canal. Place one 4 X 4-inch sponge in irrigation solution, wring out excess solution, and clean any debris from the external ear and the meatus of the auditory canal.
NOTE: When using a cotton-tipped applicator, be careful not to stick it to far into the
ear as the tympanic membrane could be ruptured.
h. Fill the irrigating syringe.
(1) Grasp the syringe bulb and/or plunger.
(2) Depress the bulb of the irrigating syringe.
(3) Place the tip of the irrigating syringe in the solution.
(4) Release the bulb and allow syringe to fill, or pull back on the syringe plunger.
i. Test the flow of solution from the syringe. Expel a small quantity of solution back into the container.
j. Position the emesis basin.
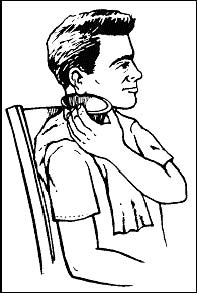
(1) Place the basin just below the ear on the affected side (see figure 6-5).
(2) Press firmly against the patient's neck (have the patient hold the basin if he is capable).
k. Straighten the ear canal.
(1) Gently grasp the auricle of the patient's affected ear.
(2) Pull the auricle up and backward for an adult.
(3) Pull the auricle down and backward for a child.
Figure 6-5. Emesis basin position.
l. Irrigate the patient's ear.
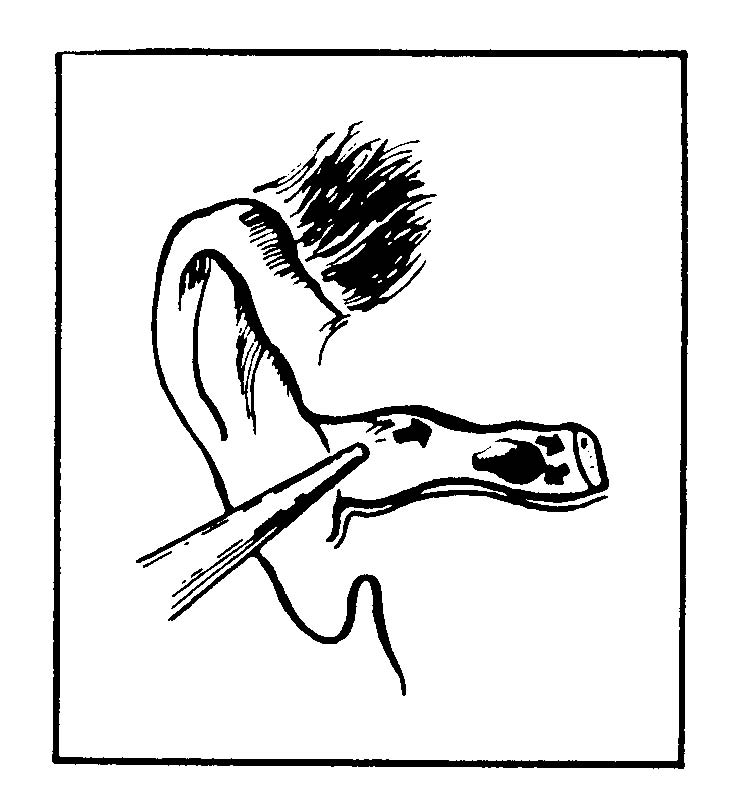
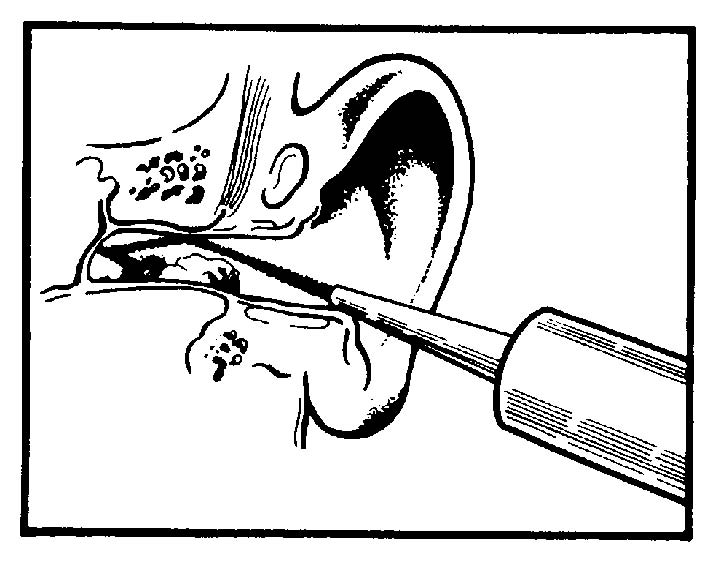
(1) Place the tip of the irrigating syringe just inside the meatus of the ear, with the tip directed toward the roof of the ear canal (see figure 6-6).
(2) Depress the bulb or plunger on the irrigating syringe.
NOTE: Never completely block the ear canal with the syringe. If space is not left
around the syringe tip, the solution will not be able to return, and undue
pressure in the canal will result.
(a) Direct a slow, steady stream of irrigating solution against the roof of the ear canal (see figure 6-7).
(b) Use no more than 500cc of irrigating solution unless ordered.
m. Repeat steps h through l until the irrigating solution returns free of wax or debris, and until the prescribed amount of solution has been used.
n. Remove the emesis basin and dry the external ear.
o. Tell the Patient to tilt his head. The patient should lean toward the affected side for a few minutes to allow any remaining solution to drain out of the ear and to dry the external ear.
Figure 6-6. Irrigating syringe placed inside the ear.
Figure 6-7. Irrigate ear.
p. Remove the drape from the patient.
q. Dispose of or clean and store equipment.

