
Treating Fractures in the Field
Lesson 4: Fractures of the Lower
Extremities
4-5
4-5. IMMOBILIZE A FRACTURED OR DISLOCATED KNEE (IMPROVISED SPLINT)
A fractured or dislocated knee is usually in a flexed (bent) position, and it is splinted in that position. The injury may include dislocation of the kneecap (patella). Instructions for immobilizing a knee in the flexed position (see figure 4-9) are given below.
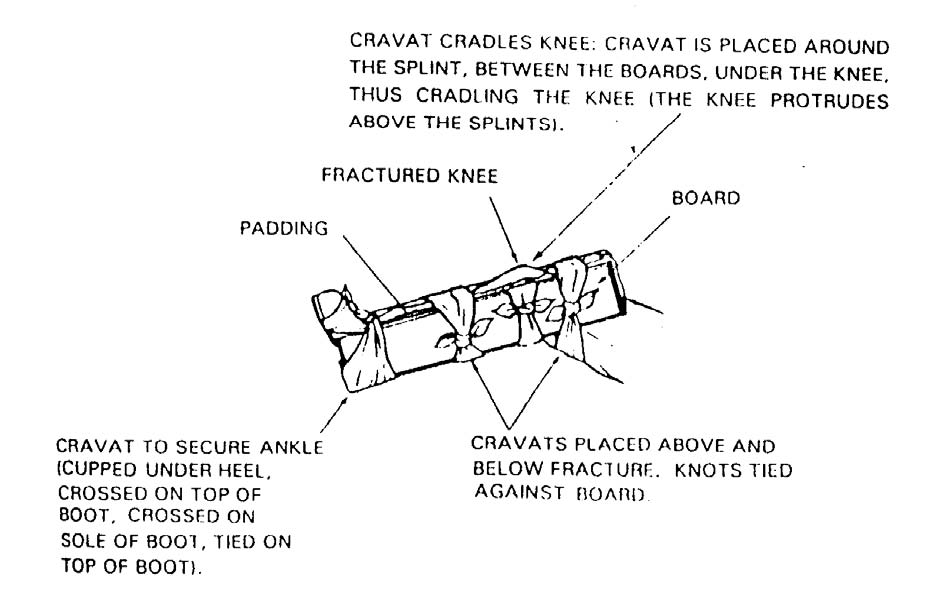
Figure 4-9. Board splint applied to a bent knee.
a. Obtain Materials. You will need two rigid objects, padding, and securing materials. The rigid objects should extend from the casualty's ankle to approximately half way up his thigh.
b. Position the Securing Materials. Position one cravat above the knee, one cravat below the knee, and one cravat beneath the ankle.
c. Apply Padding. Place padding on the inside of the rigid objects.
d. Position the Rigid Objects. Place one padded rigid object on the inside of the injured leg and the other on the outside. Do not attempt to straighten the knee. If the casualty is able, you can have him hold the rigid objects in place while you secure them.
e. Secure the Rigid Objects and Check Circulation. Wrap the cravats (or other securing materials) around the rigid objects so they immobilize the limb. Three cravats should be applied: above the knee, below the knee, and at the ankle. Tie the tails of each cravat in a non-slip knot on the outer rigid object. The cravats should be tight enough to hold the rigid objects securely in place, but not tight enough to interfere with blood circulation. (You should be able to slip one finger beneath the knot.) Check the casualty's pulse after each cravat is tied. If the cravat interferes with the casualty's circulation, loosen the cravat and apply it again.
(1) Secure the cravat above the knee.
(2) Secure the cravat below the knee.
(3) Secure the cravat under the ankle. Cup the heel in the cravat, bring the cravat up the outside of the splints, cross the tails over the boot, bring the tails down below the sole of the boot, cross the tails, bring the tails back to the top of the boot, and tie the tails in a non-slip knot at the instep.
f. Cradle Knee. Apply a fourth cravat to cradle the knee. The knee will protrude above the rigid objects.
(1) Insert one end of the cravat between the outer rigid object and the knee.
(2) Bring the end under the knee and between the knee and the inner rigid object.
(3) Bring both ends straight up for measurement.
(4) Adjust the cravat so the outer tail is about 6 inches longer than the inner tail.
(5) Bring each tail over the top of its rigid object, down, under the knee, and up the other rigid object.
(6) Bring the inside tail across to the outside of the outer rigid object.
(7) Tie the tails together in a non-slip knot on the outer rigid object.
