a. Assemble the following clean items on a tray and place the tray on the patient’s bedside stand.
(1) Nasogastric (NG) tube of size and style specified by physician.
(2) Sponge basin containing ice p.r.n. (Use ice to chill a rubber tube, to stiffen it and make insertion easier. Do not chill a plastic tube.)
(3) Catheter tip style syringe, 30ml–50ml.
(4) Emesis basin.
(5) Paper tissues.
(6) Water soluble lubricant.
(7) Glass of water and straw.
(8) Stethoscope.
(9) Bath towel or chux pad.
(10) Clamp for tubing.
(11) Adhesive tape.
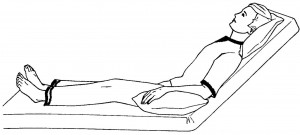
b. Explain the procedure to the patient. Provide privacy. Position the patient sitting upright in bed or in a chair.
c. Place a towel or Chux pad around the patient’s neck as a “bib”.
d. Place the tissues and the glass of water convenient to the patient’s hand. Tell him that small sips of water will help him to swallow during the procedure and that he can expect tears and flow of nasal secretions.
CAUTION: Do not emphasize the possibility of gagging or vomiting, but place the emesis basin convenient to your hand.
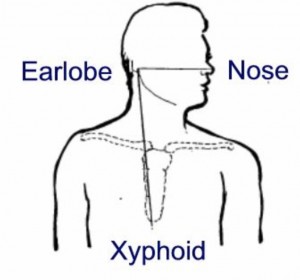
e. Measure the correct length of tubing to be inserted by following the steps below. (This is done to ensure passage of the tube into the stomach.)
(1) Use the tube to measure from the patient’s ear lobe to the tip of his nose, plus:
(2) The distance from the tip of the nose to the bottom of the xiphoid process (tip of breastbone). Mark this distance with a piece of adhesive tape.

f. Lubricate the tip of the tube with water-soluble lubricant to prevent injury to the nasal mucosa.
g. Insert the tube.
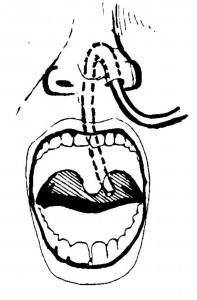
(1) Instruct the patient to tilt his head back and insert the tube into one of the nares. Advance slowly.
(2) When you feel the tube begin to curve down in to the pharynx, instruct the patient to tilt his head forward slightly. This position facilitates passage of the tube by closing the trachea and opening the esophagus for ease of swallowing.

(3) Unless contraindicated, instruct the patient to swallow sips of water. Continue to advance the tube to the desired distance as the patient swallows.
(4) Advance the tube the measured distance.
CAUTION: Discontinue insertion immediately if the patient coughs or chokes. Remove the tube completely. Allow the patient to rest for a few minutes before attempting reinsertion. Discontinue the procedure again if coughing, choking, or excessive gagging occurs. Report two unsuccessful attempts to the professional nurse.
h. Test for placement of tube in stomach. (Tube may be lightly taped to avoid movement during placement testing.)
(1) One method is to aspirate with a syringe. Fit the syringe tip snugly into the end of the tube. Aspirate slowly and observe the barrel of the syringe for gastric content return.
(2) Another method is to place a stethoscope over the epigastric area and inject 5 ml of air into the tube. Air can be detected by a whooshing sound entering the stomach rather than the bronchus.
(3) Test to make sure the tube is not in the trachea. As the patient exhales, immerse the end of the tube momentarily in water. No bubbles should appear. If they do appear on exhalation, pinch off and remove the tube immediately.
(4) If it is certain that the tube is in the stomach but no secretions have been aspirated, wait a minute or so. Encourage the patient to relax. Try aspiration again. The tube sometimes becomes kinked or momentarily plugged with mucus or a food particle.
i. Following successful aspiration, clamp the tube until you are ready to begin the procedure for which the tube was inserted.
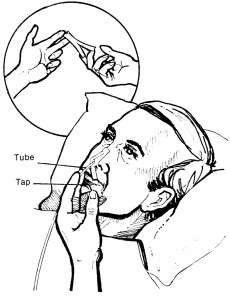
j. Tape tube in place at nostril, using strips of hypoallergenic tape. Split one 3-inch length of tape halfway down its length. Wrap one split end around the tube at the nostril entry point. Center the tube in the nostril to prevent pressure on either side. With the two free ends, anchor the tube to the bridge of the nose.

k. Report the completion of the procedure to the professional nurse, and record the procedure on the nursing notes.

