A tourniquet is applied only if bleeding from an upper arm, forearm, thigh, or lower leg threatens the casualty’s life.
Procedures for applying a tourniquet follow.
a. Select the Tourniquet Site.
Select the area on the limb where you will place the tourniquet band.
The site should be two to four inches above the edge of the wound (between the wound and the heart), but not over a joint. If a field dressing has been applied, the tourniquet must be above the edge of the field dressing. If the wound is just below the elbow or knee, select a site above the joint and as close to the joint as possible.
b. Apply the Combat Application Tourniquet, if Available.
If a Combat Application Tourniquet (CAT) is available, use it.
(1) Remove the CAT from its pouch.
NOTE: The CAT is packaged in its one-handed configuration.
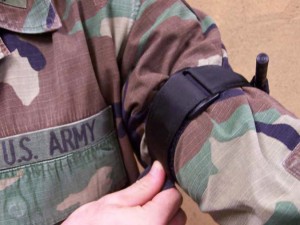
(2) Slide the wounded extremity through the loop of the self-adhering band (figure 2-13) and position the CAT at the tourniquet site (two to four inches above the wound) (figure 2-14).
CAUTION: If the wound is more than four inches below the knee or elbow, initially position the tourniquet band two to four inches above the wound. If a tourniquet applied below the joint does not stop the bleeding, apply a second tourniquet above the joint. Do not remove the first tourniquet until the second tourniquet has been applied.
(3) Pull the free running end of the self-adhering band tight and securely fasten it back on itself (figure 2-15). Do not adhere the band past the windlass clip.
(4) Adhere self-adhering band completely around the limb until the clip is reached (figure 2-16).
(5) Twist the windlass rod until the bright red arterial bleeding has stopped (figure 2-17).
NOTE: Darker bleeding (drainage from the veins) may still continue for a while.
(6) Lock the windlass rod in place with the windlass clip (figure 2-18).
(7) For small extremities, continue to adhere the self-adhering band around the extremity and over the windlass rod (figure 2-19).
(8) Grasp the windlass strap, pull it tight, and adhere it to the Velcro on the windlass clip (figure 2-20).
(9) At this point the tourniquet is secure (figure 2-21).
(a) For added security (and always before moving a casualty) secure the windlass rod with the windlass strap.
(b) For small extremities, also secure the self-adhering band under the windlass strap.
(c) It is recommended that you tape over the entire device and windlass to further secure the tourniquet for transport.
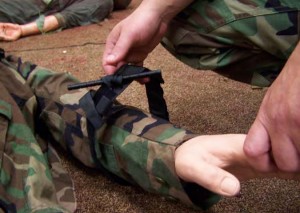
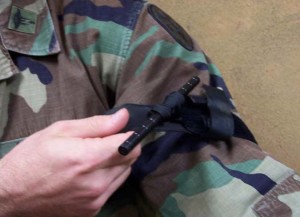
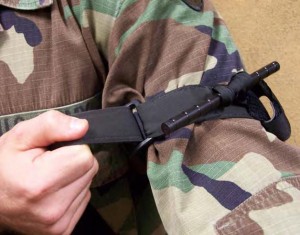
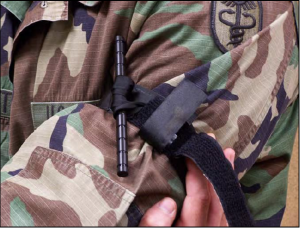
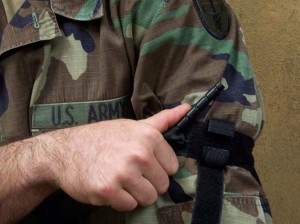
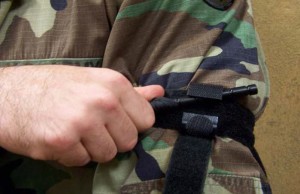
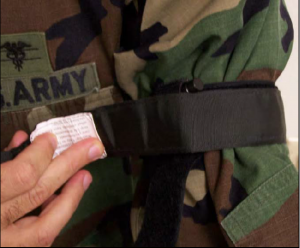
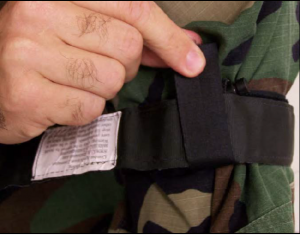
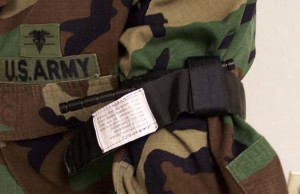
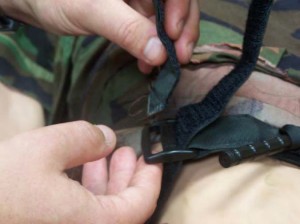
(10) The friction adaptor buckle is not necessary for proper CAT application to an arm (figure 2-22). However, it MUST be used when applying to a leg. For this reason it is recommended to prepare all of your CAT in this manner so they will be ready for action (figure 2-23).
c. Apply an Improvised Tourniquet, if Needed.
If a CAT is not available, you can apply an improvised tourniquet.
(1) A tourniquet can be improvised from a sphygmomanometer if one is available. Place the bladder (blood pressure cuff) around the tourniquet site, tape it completely around to keep the Velcro from popping loose, and inflate the bladder until no pulse is detected below the bladder, and leave the bladder inflated.
(2) Procedures for making an improvised tourniquet using a cravat and a rigid object are given in Section III.
(3) Many improvised and manufactured tourniquets are available. Some, even those still available through the Army system, may not be effective in stopping all arterial bleeding. The basic cravat and stick tourniquet is still one of the simplest and most effective tourniquets. Research has shown that a tourniquet must have an external windlass or ratcheting device to be effective; so called one-handed tourniquets can not be effectively tightened.
d. Check the Effectiveness of the Tourniquet.
Check for a pulse below the tourniquet.
If the tourniquet has stopped arterial blood flow, there should be no pulse. Also, the bright red arterial bleeding will have stopped. The darker venous blood may continue to ooze even after the tourniquet has been properly applied. If there is still a pulse below the tourniquet or if arterial bleeding continues, tighten the tourniquet.
