|
|
|||||
Plaster Cast a Forearm FractureThis procedure is ideally performed by three people (in addition to the casualty):
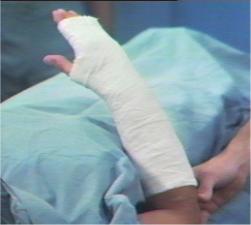
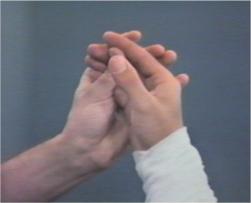
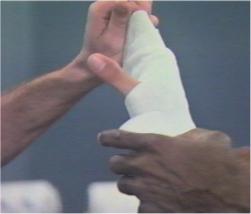
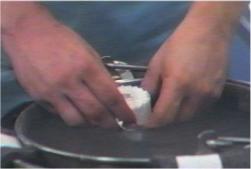
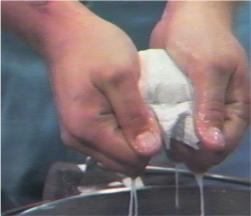
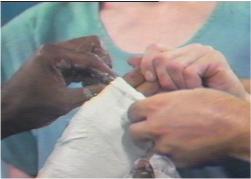
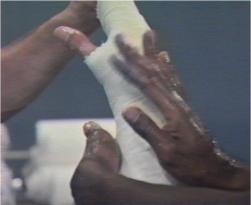
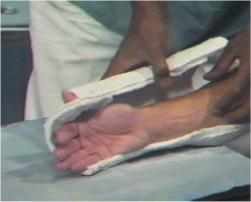
The Arm-Holder positions the arm, hand and wrist in proper alignment, and in a position of function. The Arm-Holder maintains that position throughout the application of the cast. The Applier unrolls Webril (soft cotton roller bandage) around the arm in a circular fashion. This extends from the hand to about two inches below the elbow. Apply it smoothly and evenly. Place some additional padding over the bony prominences of the wrist. The Plaster-Preparer opens a 3-inch roll of plaster, and lifts the free end about an inch out from the roll (to make it easier to unroll when wet.) Dip the the plaster in slightly warmed water, immersing it completely. If the water is cold, the plaster will take too long to set and dry. If the water is too hot, the plaster will set too quickly. The roll should be immersed perpendicularly into the water, to allow air bubbles to easily escape. As the plaster softens, gently massage the roll to encourage even distribution of the water and to expel air bubbles. The Plaster-Preparer removes the roll from the water, squeezes out excess water, and hands it to the Applier with the free end sticking out. The Applier unrolls the plaster in a circular fashion around the forearm. Start about 1/2 inch from the margin of the Webrill. Unroll the plaster smoothly, without using tension. Smooth the plaster with the palm of your hand as you go. Using your fingers may cause indentations in the plaster. Once about half the roll has been applied, the Plaster-Preparer will open another plaster roll and soak it in the slightly warm water. Then it will be ready as soon as the Applier has finished with the first roll. The Applier continues to unroll and smooth the first roll of plaster, up to 1/2 inch from the edge of the Webrill. Using the second roll, a second layer of plaster is laid down, over the first. The excess 1/2 inch of Webil at each endl is folded over and incorporated into the second layer to make for a smooth, soft cast edge and to help avoid breaking or fragmenting of the edge of the cast. After the final layer of plaster is in place, the Applier wets his hands and makes a final smoothing of the exterior of the plaster cast, using his palms. Gentle but firm pressure is used to encourage the cast to conform to the body contours. Trim any excess plaster around the thumb opening to avoid irritation and promote function. Wash off any plaster spattering of the skin, and allow the cast to dry. Watch a Video showing this technique.
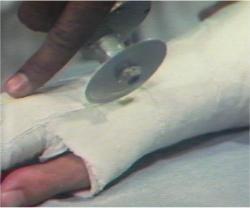
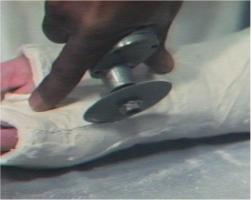
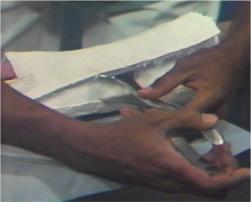
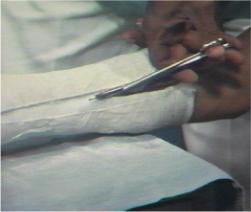
To remove the cast, use a cast saw (vibrating saw which will not hurt or injure the underlying tissues if it touches them). Use the cast saw to split the cast on two sides. In choosing the split line, avoid bony prominences. Press the cast saw straight down, until you pass through the plaster and into the underlying Webril. Then lift up the saw and move it before re-applying it to the cast. Don't slide the saw along the split line. After the cast is completely split with the saw, turn the cast over and make a second split on the other side. When both sides of the cast are split, use a cast spreader to further increase the cast separation. Once you have enough separation, slide a heavy bandage scissors underneath the Webril layer along the splits and cut through it. Once the Webril is cut, the split cast will simply lift off. This section is based on A1701-68-0095V, "Application of Plaster Casts." Health Sciences Media Division, US Army Medical Department C&S, Fort Sam Houston, Texas
Home · Military Medicine · Sick Call · Basic Exams · Medical Procedures · Lab and X-ray · The Pharmacy · The Library · Equipment · Patient Transport · Medical Force Protection · Operational Safety · Operational Settings · Special Operations · Humanitarian Missions · Instructions/Orders · Other Agencies · Video Gallery · Forms · Web Links · Acknowledgements · Help · Feedback Approved for public release; Distribution is unlimited.
*This web version is provided by The Brookside Associates, LLC. It contains original contents from the official US Navy NAVMED P-5139, but has been reformatted for web access and includes advertising and links that were not present in the original version. The medical information presented was reviewed and felt to be accurate in 2001. Medical knowledge and practice methods may have changed since that time. Some links may no longer be active. This web version has not been approved by the Department of the Navy or the Department of Defense. The presence of any advertising on these pages does not constitute an endorsement of that product or service by either the US Department of Defense or the Brookside Associates. The Brookside Associates is a private organization, not affiliated with the United States Department of Defense.
© 2015, Brookside Associates, LLC. All rights reserved
|
|
||||