|
Combat Skills of
the Soldier
FM 21-75
HEADQUARTERS
DEPARTMENT OF THE ARMY
Washington, DC,
3 August 1984
APPENDIX B
Demolitions
There will be times when you have to use demolitions for:
-
Breaching minefield.
-
Breaching wire obstacles.
-
Clearing landing zones.
-
Blowing holes in walls of buildings.
-
Blowing down trees to create obstacles.
HOW TO PREPARE FIRING SYSTEMS
Information on the preparation and placement of demolition charges
is in FM 5-25 and in GTA 5-10-27. This appendix covers the preparation of firing
systems that are basic to all demolition work. There are two types of firing
systems -- NONELECTRIC SYSTEM and ELECTRIC SYSTEM.
NONELECTRIC SYSTEM
To prepare a nonelectric firing system, take these steps:
-
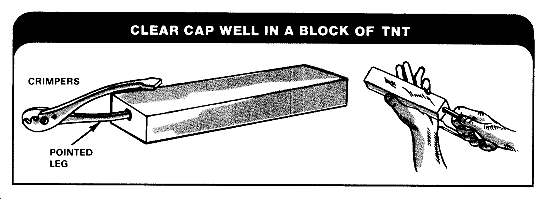
STEP 1. Clear the cap well of a block of TNT or push a hole
about the size of a blasting cap (3 cm [1 1/3 in] deep and .65 cm [1/4 in] in
diameter) in a block of C4 explosive.
-
STEP 2. To help prevent a misfire, cut and discard 15-cm
(6-in) length of fuse from the free end of the time blasting fuse. That part
of the fuse may have absorbed some moisture from the air through the exposed
powder in the end of the fuse.
-
STEP 3. Determine what length of fuse is needed. To do this,
first compute the burning time of a 91.4-cm (3-ft) section of fuse. Divide
this burning time by 3 to find the burning time of 30.5 cm (1 ft) of fuse.
Next, determine the time it takes to reach a safe distance from the explosion.
Now divide the time required to reach that distance by the burn time of 30.5
cm (1 ft) of fuse. This will give the number of centimeters (ft) of fuse
needed.
-
STEP 4. Inspect the nonelectric blasting cap to make sure it
is clear of foreign matter.
-
STEP 5. Gently slip the blasting cap over the fuse so that
the flash charge in the cap is in contact with the end of the time fuse. DO
NOT FORCE THE FUSE INTO THE CAP.
-
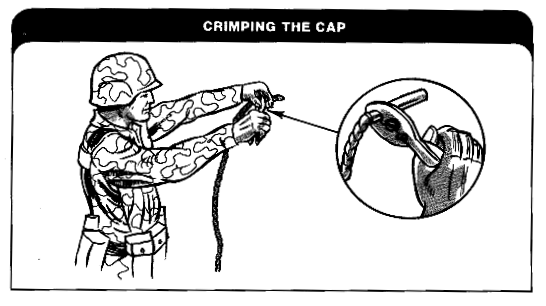
STEP 6. After seating the cap, crimp it 3.2 mm (1/8 in) from
the open end of the cap. Hold it out and away from your body when crimping.
-
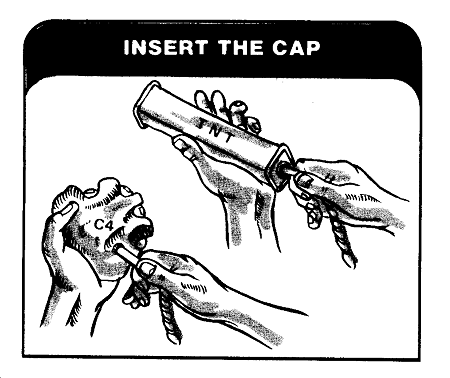
STEP 7. When using TNT, insert the blasting cap into the cap
well. When using C4, place the cap into the hole made in the C4 and mold the
C4 around the cap. DO NOT FORCE THE CAP INTO-THE HOLE.
-
STEP 8. Insert the free end of the fuse into an M60 fuse
igniter and secure it in place by screwing on the fuse holder cap.
-
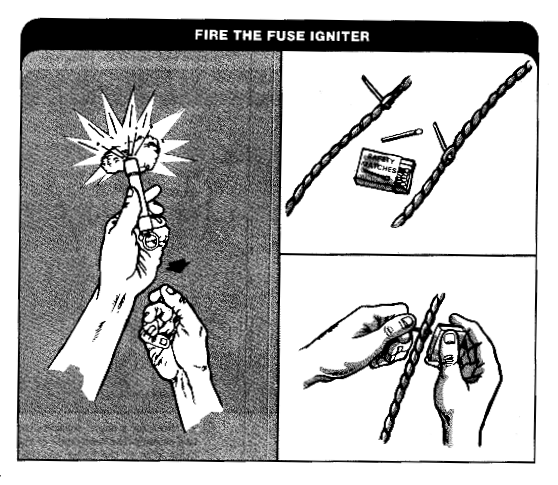
STEP 9. To fire the fuse igniter, remove the safety pin, hold
the barrel in one hand. Take up the slack, before making the final strong
pull. If the fuse igniter misfires, reset it by pushing the plunger all the
way in. Then try to fire it as before. If it still misfires, replace it.
-
STEP 10. If a fuse igniter is not available, split the end of
the fuse and place the head of an unlighted match in the split. Make sure the
match head is touching the powder train.
-
STEP 11. Then light the inserted match head with a burning
match or strike the inserted match head on a matchbox.


If the fuse burns but the explosive charge does not go off, there
is a misfire. Wait 30 minutes before trying to clear it. If the misfire charge
was not tamped (nothing packed around it), lay another charge of at least one
block of C4 or TNT beside it. If it was tamped, place at the least two blocks of
C4 or TNT beside it. Do not move the misfire charge. The detonation of the new
charge should detonate the misfire charge.
ELECTRIC SYSTEM
To prepare an electric firing system, take these steps:
-
STEP 1. After finding a safe firing position and a place for
the charge, lay out the firing wire from the charge position to the firing
position. Before leaving the charge position, anchor the firing wire to
something. Always keep the firing device with you. Do not leave it at the
firing position.
-
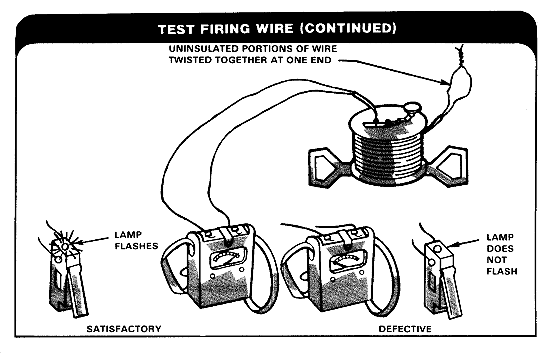
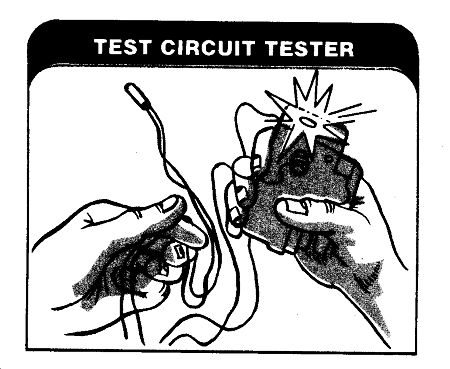
STEP 2. Check the firing wire with the galvanometers or
circuit taster to make sure it does not have a short circuit or a break. This
is best done with one man at each end of the firing wire.
-
To check for a short, separate the two strands (the bare ends)
of the firing wire at the firing position. Have the other soldier do the
same thing with the other end of the wire at the charge position. At the
firing position, touch the bare ends of the two strands to the
galvanometer/circuit tester posts. The needle on the galvanometers should
not move, nor should the light on the circuit tester come on. If the needle
does not move or if the light does not come on, the wire has a break--replace
it.
-
If the wire has no short when tested, test it for a
break. Have the soldier at the charge position twist the bare ends of
the strands together. Then touch the two strands at the firing position to
the galvanometers/circuit tester posts. That should cause a wide deflection
of the galvanometer needle or cause the circuit tester light to come on. If
the galvanometers needle does not move or if the light does not come on, the
wire has a break--replace it.
-
STEP 3. At the firing position, check the blasting cap with a
galvanometers or circuit tester to make sure it does not have a short. Remove
the short circuit shunt and touch one cap lead wire using the galvanometers,
the needle should make a wide deflection. If it does, the cap is good.
-
If the needle fails to move or only makes a slight deflection,
replace the cap.
-
When using the circuit tester, the light should come on when
the handle is squeezed. If it does not replace the cap.
-
STEP 4. Move to the charge position and, if the charge is a
block of TNT, clear its cap well if the charge is a block of C4 plastic
explosive, push a hole in it about the size of a blasting cap.
-
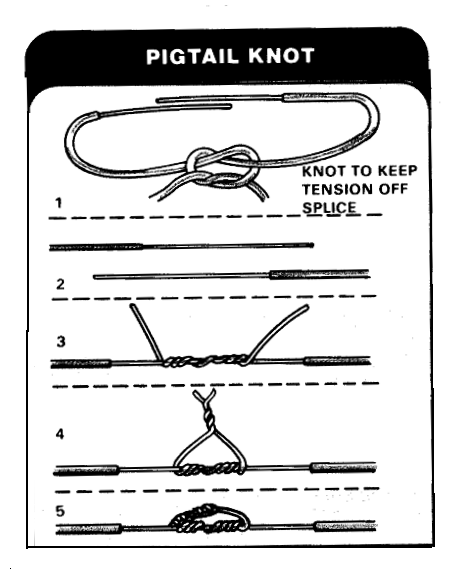
STEP 5. Position the charge. Then splice the lead wires of
the cap to the, firing wire (pigtail knot).
-
STEP 6. Insert the cap into the cap well of the TNT and
secure it with the priming adapter, or insert the cap into the hole made in
the C4 and mold the explosive around the cap.
-
STEP 7. Move back to the firing position and check the wire
circuit with the galvanometers or circuit tester (same technique as described
earlier).



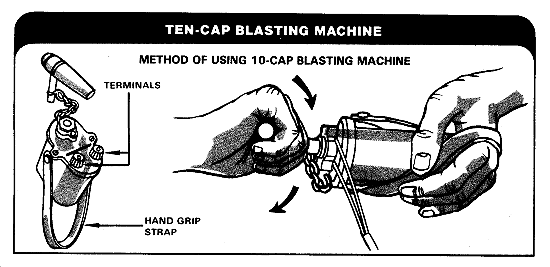
If the circuit checked out and the blasting machine does not set
off the charge, there is a misfire.
If an untamped charge misfires, investigate at once. If the charge
is tamped, wait 30 minutes before investigating, then take these steps:
-
STEP 1. Check the firing wire connection to the blasting
machine to be sure that the contacts are good.
-
STEP 2. Make two or three more attempts to fire the charge.
-
STEP 3. Try to fire it again using another blasting machine.
-
STEP 4. Disconnect the firing wire from the blasting machine
and shunt (twist together) the ends of the wire.
-
STEP 5. Move to the charge position to investigate. Take the
blasting machine with you.
-
STEP 6. Check the entire circuit, including the firing wire,
for breaks and short circuits.
-
STEP 7. Make no attempt to remove the primer or the charge.
-
STEP 8. If the fault has not been found, place a new primed
charge beside the misfire charge.
-
STEP 9. Disconnect the old blasting cap wires from the firing
wire and shunt the ends of the blasting cap wires.
-
STEP 10. Attach the new blasting cap wires to the firing wire
and fire the new charge. This should also detonate the misfire charge.
|
WARNING
CURRENT FROM RADIO FREQUENCY SIGNALS MAY CAUSE PREMATURE
DETONATION OF ELECTRIC BLASTING CAPS. MOBILE TYPE TRANSMITTERS AND
PORTABLE TRANSMITTERS ARE PROHIBITED WITHIN 50 METERS OF ANY ELECTRIC
BLASTING CAPS OR ELECTRICAL FIRING SYSTEMS.
LIGHTNING IS ALSO A HAZARD TO BOTH ELECTRIC AND NONELECTRIC
BLASTING CHARGES. THE ONLY SAFE PROCEDURE IS TO SUSPEND ALL BLASTING
ACTIVITIES DURING AN ELECTRICAL STORM OR WHEN ONE IS THREATENING.
ELECTRIC FIRING SHOULD NOT BE CONDUCTED WITHIN 155 METERS OF
ENERGIZED POWER TRANSMISSION LINES. |
|
|
Approved for public release;
Distribution is unlimited.
The listing of any non-Federal product in this CD is not an endorsement of the
product itself, but simply an acknowledgement of the source.
Bureau of Medicine and Surgery
Department of the Navy
2300 E Street NW
Washington, D.C
20372-5300 |
Operational Medicine
Health Care in Military Settings
CAPT Michael John Hughey, MC, USNR
NAVMED P-5139
January 1, 2001 |
United States Special Operations
Command
7701 Tampa Point Blvd.
MacDill AFB, Florida
33621-5323 |
*This web version is provided by
The Brookside Associates Medical Education Division. It contains
original contents from the official US Navy NAVMED P-5139, but has been
reformatted for web access and includes advertising and links that were not
present in the original version. This web version has not been approved by the
Department of the Navy or the Department of Defense. The presence of any
advertising on these pages does not constitute an endorsement of that product or
service by either the US Department of Defense or the Brookside Associates. The
Brookside Associates is a private organization, not affiliated with the United
States Department of Defense.
Contact Us · · Other
Brookside Products

|
|
Operational Medicine 2001
Contents
|

|


