![]()
Multimedia Edition
|
Section IV: The Surgical Scrub
a. Requirements for Performance of a Complete Scrub. The specialist is to perform a scrub in the following instances:
(1) Before the first case in the morning.
(2) Between cases.
b. Methods. As local policy prescribes, the specialist will scrub by one of the following methods:
(1) Time method. Using a clock or some other timing device to measure brushing time, the length of the scrub varies from one institution to another. This method has been most frequently used in the past.
(2) Brush-stroke method. A prescribed number of brush-strokes, applied lengthwise of the brush or sponge, is used for each surface of the fingers, hands, and arms.
1-15. PRINCIPLES
The specialist should follow certain principles when performing the surgical scrub (see Table 1-1).
|
Table 1-1. Surgical scrub principles. |
|
| Rinsing time: | Is not to be included in the total scrub time if the timed method is to be used. |
| Unsterile objects: | Should not be touched once the scrub procedure has begun. |
| Entire scrub procedure: | Must be repeated if an unsterile object is touched. |
| Same scrub procedure: | Should be utilized for every scrub, whether it is the first or last one of the day. |
| Local policy: | May specify the time lengths and brush strokes for scrub procedures between cases. |

1-16. PROCEDURE
a. Both surgical scrub methods follow an anatomical pattern of scrub. One should think of the fingers, hands, and arms as having four sides or surfaces. If properly executed, both methods are effective and each exposes all surfaces of the hands and forearms to mechanical cleaning and chemical antisepsis.
b. In the following paragraphs, the brush-stroke method is described, using a disposable, prepackaged, pre-sterilized sponge/brush, impregnated with a surgical detergent.
|
(1) Regulate the flow and temperature of the water. (2) Pretear package containing brush (see Figure 1-4); lay the brush on the back of the scrub sink.
|
|
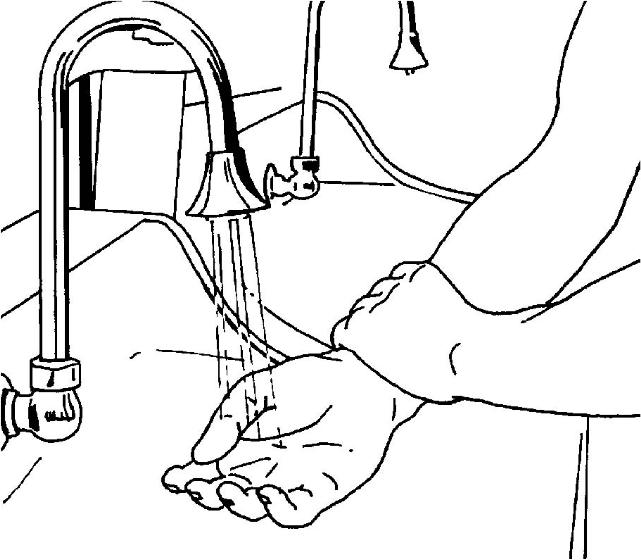
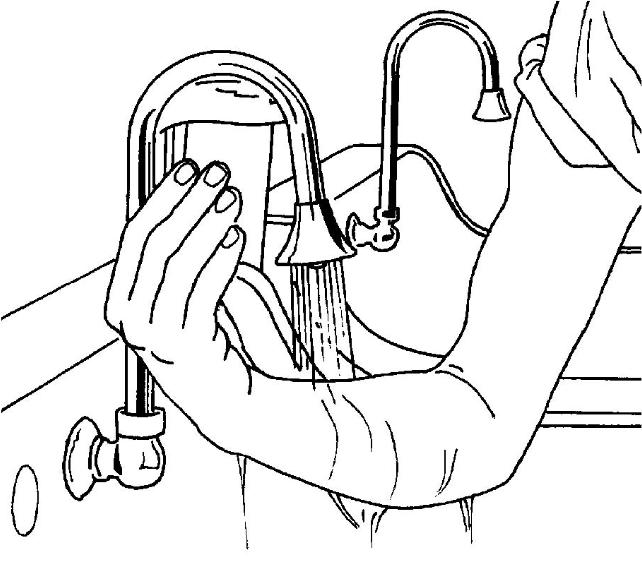
| (3) Wet hands and arms (see Figure 1-5) for an initial prescrub wash. Use several drops of surgical detergent, work up a heavy lather, then wash the hands and arms to a point about two inches above the elbow. |
|
| (4) Rinse hands and arms thoroughly, allowing the water to run from the hands to the elbows (see Figure 1-6). Do not retrace or shake the hands and arms; let the water drip from them. |
|
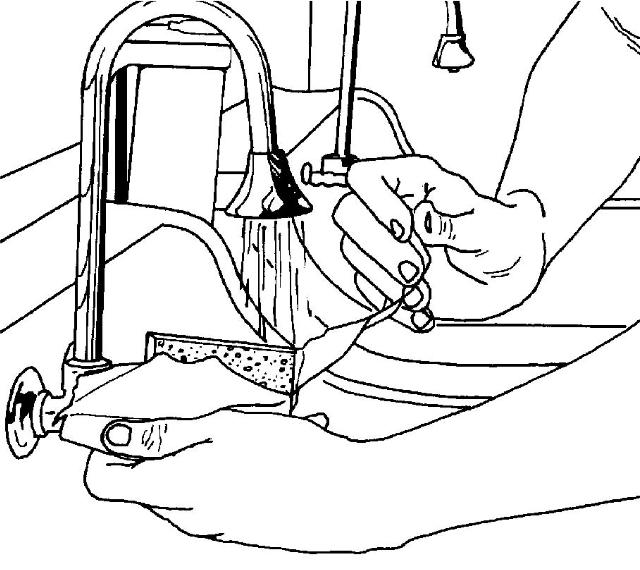
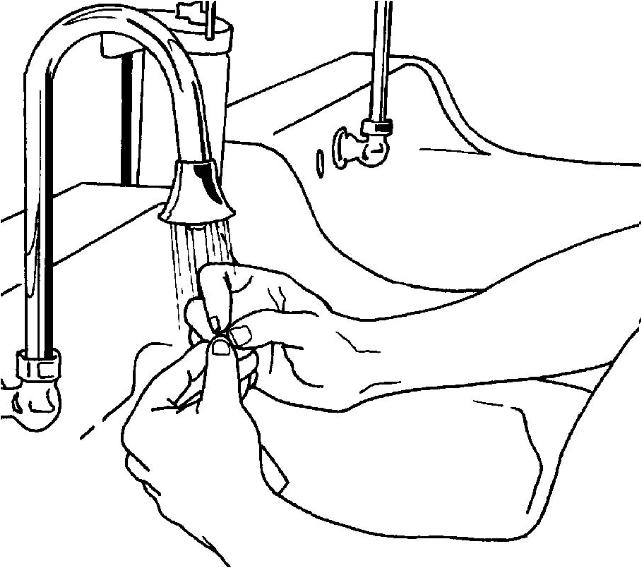
| (5) Remove the sterile brush and file, moisten brush and work up a lather. Soap fingertips and clean the spaces under the fingernails of both hands under running water (see Figure 1-7); discard file.
|
|
| (6) Lather fingertips with sponge-side of brush; then, using bristle side of brush, scrub the spaces under the fingernails of the right or left hand 30 circular strokes (see Figure 1-8). When scrubbing, slightly bend forward, hold hands and arms above the elbow, and keep arms away from the body. |
|
| (7) Lather digits (see Figure 1-9); scrub 20 circular strokes on all four sides of each finger. | 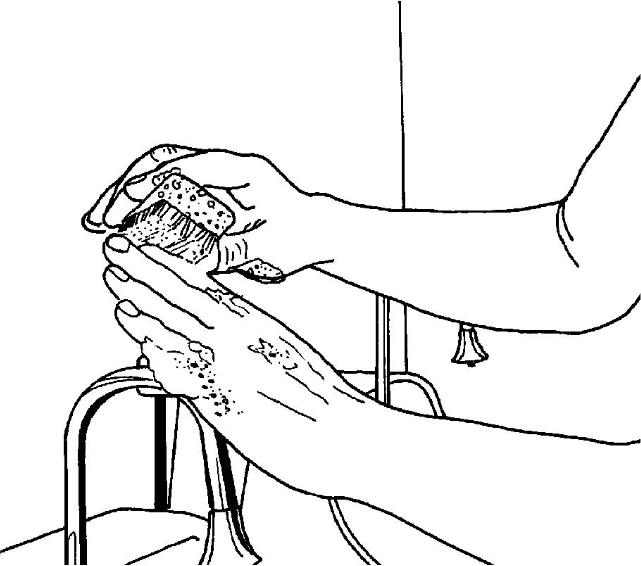 Figure 1-9 |
| You may begin with the thumb or little finger (see Figure 1-10) or the right or left hand. Scrub one hand and arm completely before moving on to the other hand and arm.
(8) Lather palm, back of hand, heel of hand, and space between thumb and index finger. Choosing either of the surfaces, scrub 20 circular strokes on each surface. (9) You are now ready to scrub the forearm. Divide your arm in three inch increments. The brush should be approximately three inches lengthwise. Use the sponge-side of the brush lengthwise to apply soap around wrist. Scrub 20 circular strokes on all four sides; move up the forearm--lather, then scrub, ending two inches above the elbow. (10) Soap and/or water may be added to the brush at any time (11) Repeat steps (6) through (9) above for the other arm. (12) Discard brush. (13) Rinse hands and arms without retracing and/or contaminating. (14) Allow the water to drip from your elbows before entering the operating room. |
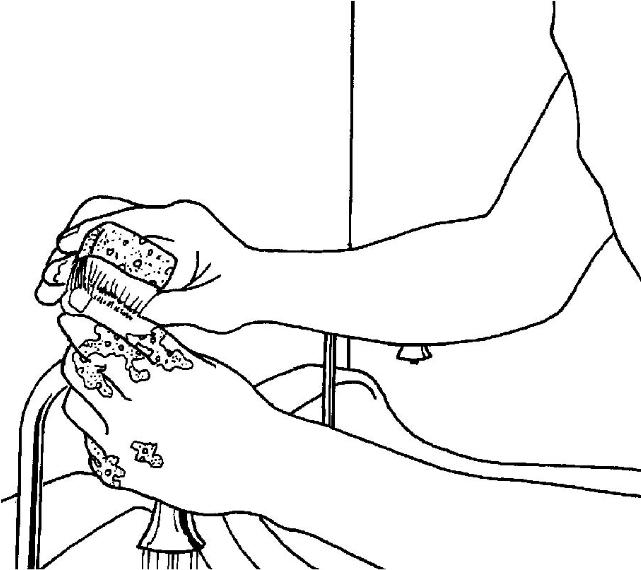 Figure 1-10
|
| (15) Slightly bend forward, pick up the hand towel from the top of the gown pack and step back from the table (see Figure 1-11). Grasp the towel and open it so that it is folded to double thickness lengthwise. Do not allow the towel to touch any unsterile object or unsterile parts of your body. Hold your hands and arms above your elbow, and keep your arms away from your body. | 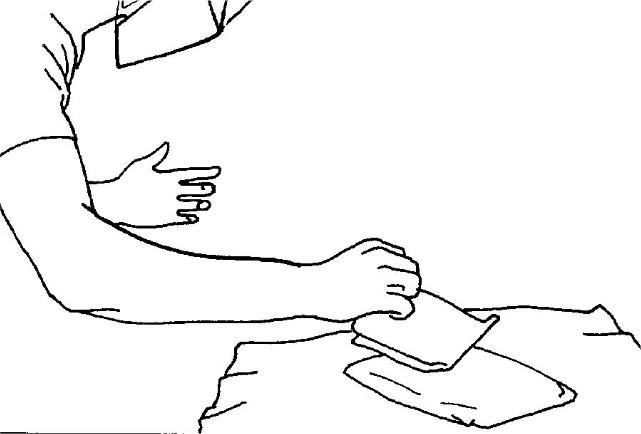 Figure 1-11 |
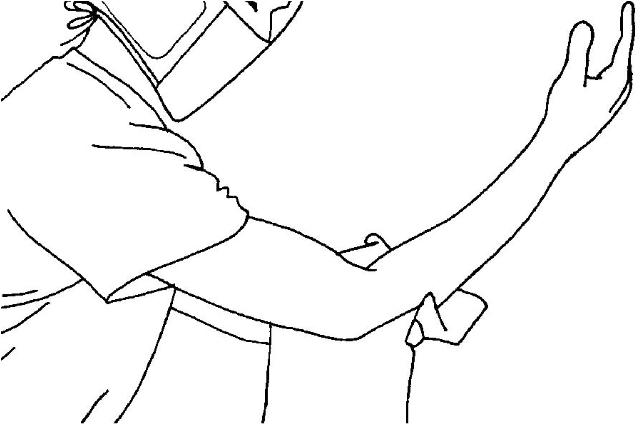
| (16) Holding one end of the towel with one of your hands, dry your other hand and arm with a blotting, rotating motion (see Figure 1-12). Work from your fingertips to the elbow; DO NOT retrace any area. Dry all sides of the fingers, the forearm, and the arms thoroughly (see Figures 1-13 and 1-14). If moisture is left on your fingers and hands, donning the surgical gloves will be difficult. Moisture left on the arms may seep through surgical cloth gowns, thus contaminating them. (17) Grasp the other end of the towel and dry your other hand and arm in the same manner as above. Discard the towel into a linen receptacle (the circulator may take it from the distal end). | 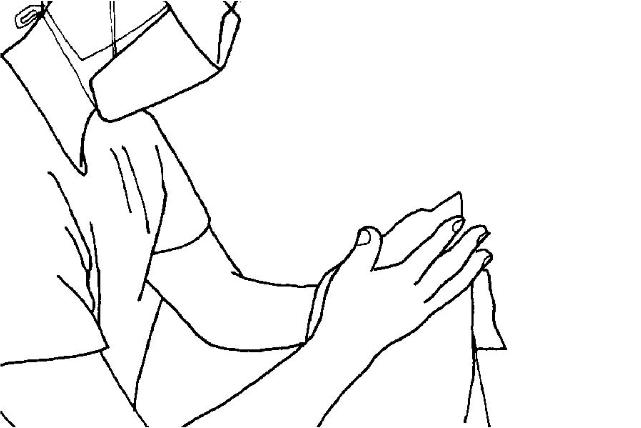 Figure 1-12
|


|
|
|
|
|||||||||
|
LESSON OBJECTIVES After completing this lesson, you should be able to: 1-1. Select safe, effective procedures and techniques for performing a surgical scrub and donning sterile gown and gloves. 1-2. Assist other members of the "sterile" team in donning gown and gloves. 1-3. Select appropriate procedures for removing gown and gloves between cases. |
|||||||||
|
|||||||||
|
The Brookside Associates Medical Education Division is dedicated to the development and dissemination of medical information that may be useful to medical professionals and those in training to become medical professionals. This website is privately-held and not connected to any governmental agency. The views expressed here are those of the authors, and unless otherwise noted, do not necessarily reflect the views of the Brookside Associates, Ltd., any governmental or private organizations. All writings, discussions, and publications on this website are unclassified.
© 2008 Medical Education Division, Brookside Associates, Ltd. All rights reserved
![]()