|
|
|||||
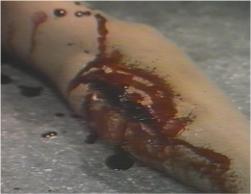
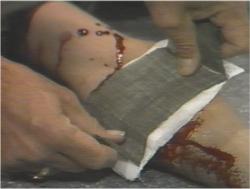
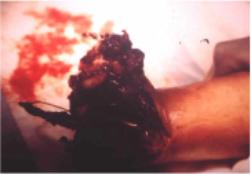
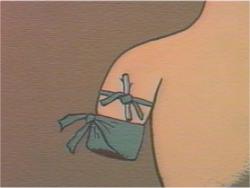
Apply a TourniquetSome bleeding cannot be stopped by direct pressure alone. In these cases, prompt application of a tourniquet may be life-saving. In many cases, you should first try applying direct pressure to the wound. If bleeding persists, then proceed to a tourniquet. If the nature of the wound is such that direct pressure will obviously not be effective, go directly to a tourniquet. Traumatic amputation of an extremity is one of those situations. Wrap a bandage around the limb, above (closer to the heart) the injury. Don't apply it directly over the wound unless you have no other choice. If you don't have a bandage, you can use:
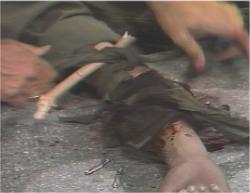
After tying the bandage, insert a stick into the knot and start twisting, round and round. This will tighten the bandage. Keep twisting until the bleeding stops and there is no pulse in the distal portion of the extremity. Tie the stick in place so it doesn't unwind, and transport the victim as quickly as possible to a definitive surgical setting. Watch a video demonstrating use of a tourniquet. During elective surgery, orthopedic surgeons routinely apply tourniquets to reduce bleeding, and leave them in place for up to two hours, without any apparent adverse effects on the limb. Longer tourniquet times are certainly possible without injury, but the longer the tourniquet is left in place, the more likely it is that hypoxic muscle injury will occur. After 10 hours, there is an increasing likelihood that the tissue below the tourniquet will not survive and will need to be amputated. For that reason, it is important to understand that application of a tourniquet is undertaken only for life-saving reasons, in which the possible loss of a limb is minor in comparison to the alternative (loss of life). To be effective in saving a life, the decision to apply a tourniquet needs to be made very quickly (within seconds, not minutes), and the application needs to be equally fast (within seconds, not minutes). Use whatever materials you have at hand. Speed is the important thing, not the attractiveness of the tourniquet. Some of the ugliest, most unattractive tourniquets have been the most effective because they stopped the bleeding immediately. If a stick is not available, you can use a tent peg, or bayonet scabbard, or the magazine from an M-16 or M-9. Try to avoid using live munitions (they pose a risk to other personnel caring for the patient) unless they are all you have. When the injury is quite distal (for example, traumatic amputation of the hand), it is tempting (and frequently successful) to place the tourniquet just above the injury (around the wrist). The problem with this placement is that because there are two bones in the forearm, you may not be able to apply enough pressure to the area between the bones, and bleeding may continue. If that happens, add another tourniquet just above the elbow, where there is only a single bone and where you will have little trouble applying enough pressure to stop any arterial bleeding. The same principle applies to wounds of the lower leg. After applying a tourniquet, place a "T" on the victim's forehead, to indicate that he or she has a tourniquet in place. Don't untwist the tourniquet unless you are prepared to deal surgically with the wound and bleeding. It does not help the downstream tissues to periodically get some blood flow, and wastes the patient's blood.
This section is based on A1701-78-1128V, "Applying a Tourniquet" Health Sciences Media Division, US Army Medical Department C&S, Fort Sam Houston, Texas
Home · Military Medicine · Sick Call · Basic Exams · Medical Procedures · Lab and X-ray · The Pharmacy · The Library · Equipment · Patient Transport · Medical Force Protection · Operational Safety · Operational Settings · Special Operations · Humanitarian Missions · Instructions/Orders · Other Agencies · Video Gallery · Forms · Web Links · Acknowledgements · Help · Feedback Approved for public release; Distribution is unlimited.
*This web version is provided by The Brookside Associates, LLC. It contains original contents from the official US Navy NAVMED P-5139, but has been reformatted for web access and includes advertising and links that were not present in the original version. The medical information presented was reviewed and felt to be accurate in 2001. Medical knowledge and practice methods may have changed since that time. Some links may no longer be active. This web version has not been approved by the Department of the Navy or the Department of Defense. The presence of any advertising on these pages does not constitute an endorsement of that product or service by either the US Department of Defense or the Brookside Associates. The Brookside Associates is a private organization, not affiliated with the United States Department of Defense. © 2015, Brookside Associates, LLC. All rights reserved
|
|
||||