|
|
Hysterectomy
Video
This video is an introductory example of an
abdominal hysterectomy using a number of techniques, appropriate for this
particular patient. Other techniques may give excellent results,
particularly in different clinical circumstances. Tying of sutures, although
generally omitted from the video, was used throughout this procedure.
Click Here to watch the video.
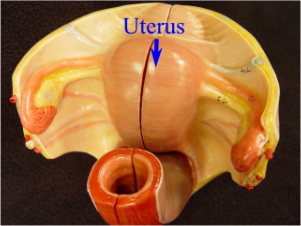
Hysterectomy is the removal of the uterus. It
involves separating the attachments of the round ligaments, fallopian tubes,
ovarian ligaments, broad ligament, uterine vessels, and uterosacral
ligaments.
- Uterine clamps are placed across both
uterine cornu and the anatomic structures inspected.
- The round ligament is suture ligated and
cut, using electrocautery. This opens the broad ligament.
- The anterior leaf of the broad ligament is
undermined and cut, to enable the bladder to be safely pushed away from
the surgical site.
- The opposite round ligament is clamped and
cut, opening the broad ligament on this side, allowing the entire vessico-uterine
peritoneum to be incised.
- The posterior leaf of the broad ligament
is opened with electrocautery, providing for isolation of the fallopian
tube and ovarian ligament.
- After cutting the pedicle, the distal end
is ligated, first with a simple tie, and followed by a suture ligature.
The proximal end remains clamped.
- The opposite side is treated the same.
This enables the bladder to be further reflected away from the surgical
field.
- The uterine vessels are skeletonized and
clamped, taking care to avoid the ureter. The opposite side is treated the
same. The bladder is then further advanced.
- Clamps are placed in a stepwise fashion,
down along the edge of the cervix on both sides, clamping, cutting, and
suture ligating until the junction of the vagina is reached. Care is taken
to avoid injury to the bladder and ureters, all of which are located
relatively close to the surgical site.
- Clamps are then placed across the
utero-sacral ligaments, completing the isolation of the uterus.
- The final attachments are cut and the
uterus removed.
- The vaginal cuff where the uterus had been
attached is inspected for bleeding or bladder injury.
- Corner sutures are put in both lateral
vaginal corners, securing the blood supply and the cardinal ligaments for
later vaginal support.
- Figure of Eight sutures are used to close
the remainder of the vaginal cuff.
- Sutures supporting the Cardinal ligaments
are tied together for upper vaginal support and irrigation fluid is used
to cleanse the pelvis before closing the abdomen.
|
|
This information is provided by
The Brookside Associates,
a private organization, not affiliated with any governmental agency. The
opinions presented here are those of the author and do not necessarily
represent the opinions of the Brookside Associates. For educational
simplicity, only one method is usually shown, but many alternative methods may give
satisfactory or superior results.
This information is provided solely
for educational purposes. The practice of medicine and surgery is regulated
by statute and restricted to licensed professionals and those in training
under supervision. Performing these procedures outside of that setting is a
bad idea, is not recommended, and may be illegal.
The presence of any advertising on
these pages does not constitute an endorsement of that product or service by
the Brookside Associates.
C. 2010 All Rights
Reserved
 |
 This is the Archived Desktop Edition.